Flexibility for Climbers: Improve Your Pike
Flexibility is often an underrated asset in rock climbing. Climbers typically focus on upper body and finger strength during training, often neglecting lower body flexibility. However, flexibility can be your secret weapon. Being able to move through a wider range of movement and maintain strength throughout opens up new movement possibilities, enabling you to try beta that may have been inaccessible previously. You might not realize how much your lower body flexibility and end-range strength could be holding you back!
In this series, Flexibility for Climbers, we’ll be providing you with simple sequences of exercises that you can use 1-2 times a week, in addition to any lower-intensity flexibility sessions. Complete the sequence of exercises in the order shown to ensure that you can get the most out of each individual component.
The sequences are comprised of 4 different sections, designed to take a holistic approach to improving lower body mobility and strength through the range.
Read all the articles:
Improve Your Pike
What is a pike?
Not only is a pike a fish but in the flexibility world, a pike is also known as a forward fold. Pike exercises primarily provide a stimulus for the back, hip flexors, hamstrings, and calves.
Why is this useful for climbing?
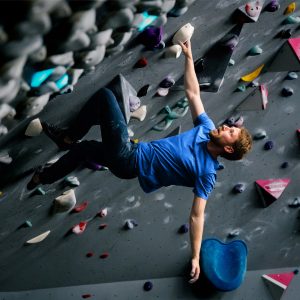
In relation to climbing, having strength through the range in the pike position is useful for heel hooking, toe hooking, and obtaining/driving through footholds that are far away
Example: Heel Hooking
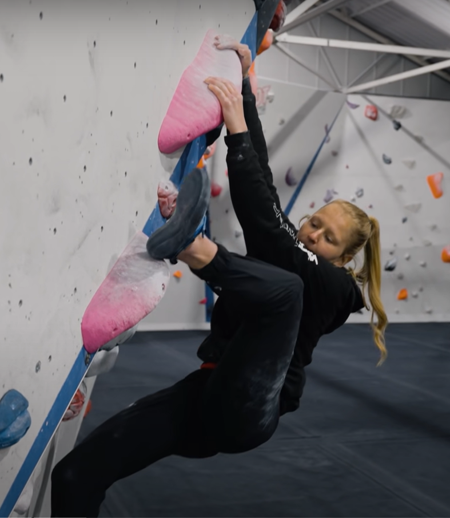
When we lift a leg to place it on a hold, the hamstrings lengthen and the hip flexors and quads shorten. So, for climbers, it’s important to provide a stimulus to lengthen the hamstrings and strengthen the shortening side of the joint as well.
Remember: Strength training should be integral to your flexibility work.
If you aim to train the strength of the agonist muscles (lifting strength, e.g. hip flexors), your range of motion will be intrinsically limited by the antagonist muscles (e.g. hamstrings/calf muscles). If you first lengthen/stretch the antagonists, you will be able to train lifting strength through a greater ROM and, in turn, consolidate your range of motion with greater mobility. For this reason, it’s important to complete the lengthening component of the session before the strengthening component. To do this effectively, it’s important to bring awareness to your movement so that you can move with intention.
1. Awareness/Control
To execute a pike/forward fold, you must first complete a hip hinge without flexing the spine/back. This should also be done without tensing the abdominal muscles, which can feel counterintuitive and take practice to perfect. When the pike/forward fold is not executed correctly, using a hip hinge, can place unnecessary strain on the spine.
The aim of the first part of your flexibility sequence is to ensure that you’re moving well and that you’re not overcompensating with other dominant muscles or compromising form. This can be using a stand-alone session (Example 1), or it could be done using a short, simple starter exercise at the beginning of the sequence to bring awareness and control to your movement (Example 2). Because the pike is a forward fold, it’s important to have an awareness of how to forward fold (or hip hinge) correctly, for the exercises within this sequence to be completed effectively.
The objective for the Seated Pike Core Compressions – Single Leg and Single Leg Good Morning exercises is to bring awareness to the hip flexors, and nothing helps you to feel a muscle working more than that sensation of pump or fatigue.
Seated Pike Core Compressions (Example 1 – Stand-Alone Session)
- Place your legs out straight in front of you.
- Put your hands on the floor, on either side of your legs, and close to your body.
- Keeping both legs straight, lift one leg off the floor, locking the hips in place.
- Squeeze and hold – ‘feel’ your hip flexors.
- Progress this exercise by reaching your hands further towards your feet, each time that you lift a leg.
- Complete 1 set of 10 reps, per side.
Single Leg Good Morning (Example 2 – Awareness Starter)
- Stand with one leg slightly in front of the other, ensuring a soft bend at the knee with your back leg.
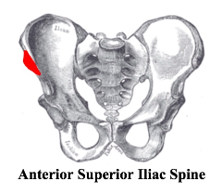
- Place your hands on the ASIS or Anterior Superior Iliac Spine (the bony bit on the front of your pelvis), as shown.
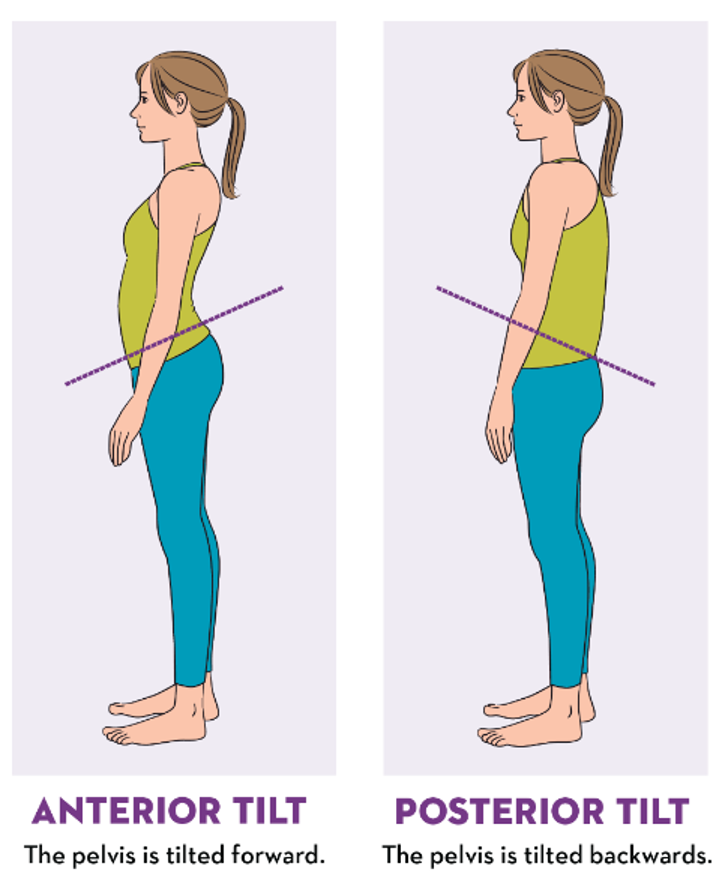
- Place your pelvis into a slight anterior/forward tilt.
- Relax the muscles of the abdomen.
- Move into a forward hip hinge, with your hands still on the ASIS. As you hinge, lead with the belly button and push your butt back (twerk it!).
- Isolate the upper body, so that it doesn’t move at all during the movement, keeping your back flat.
- If you’re finding this tricky, place a folded towel between your legs and squeeze it as you forward fold.
Recommended: Complete 1 set of 10 reps (per side) at bodyweight to bring awareness.
2. Facilitator
This part of the sequence is included to set up for the rest of the session by lengthening the antagonists. The two simple exercises provided below can be completed at bodyweight.
Calf Stretch
Many athletes describe that it is the sensation of tightness in their calves that often inhibits their range of motion, rather than tightness in their hamstrings. This exercise is included to reduce this sense of tension and to reduce compression of the sciatic nerve.
- On a step, drop your heels and lower your weight one foot at a time.
- Try to relax and breathe deeply.
- DO NOT stretch to such an extent that you feel pain, pinching or discomfort in the joint.
Recommended: Complete 3 reps for 30 seconds.
Hamstring Stretch
- Sit down with one leg full extended forward and one leg folded in.
- Lean forward and stretch one leg at a time.
- Use a band, belt or similar to help pull you deeper into a stretch if you can’t reach your foot.
- Do NOT stretch to such an extent that you feel pain, pinching or discomfort in the joint.
- Complete 3 reps for 30 seconds.
To improve the time efficiency of your flexibility session, you may wish to superset the Calf Stretch and Hamstring Stretch.
3. Range of Motion / Antagonist
The aim of this component of the session is to improve the range of motion on the antagonist side. For the pike/front fold, the primary antagonist muscles are the hamstrings and the muscles of the calf
Elevated Single Leg Good Morning (Elevated SL-GM Tempo Stretch)
- Whilst standing on one leg, place the other foot on the floor in front of you.
- Hinge forwards at the hips while pushing your butt backwards.
- Keep your back flat throughout.
- Set the intention for the session, which is TEMPO.
Tempo stretching is dynamic stretching. You MUST move slowly to avoid muscle reflex (tightening of muscles). Moving too fast limits the effectiveness of this stretch. You should also move into the maximum tolerable limit for each rep, aiming to get lower each time.
Tempo is prescribed in 4 phases, each that correspond to seconds:
- 3s – eccentric/lowering
- 2s – pause at the bottom
- 2s – concentric/lifting
- 1s – pause at top
This session can be progressed by:
- Trying to access a greater range of motion
- Elevating your leg on a box/step (as shown)
- Adding weight (as shown).
Recommended: Complete 3 sets of 4 reps with an 8-second Working Rep Time. 60 seconds Inter Set Rest.
Top Tip: If adding load, remember the weight should only be used to pull you that little bit deeper into the stretch position. Don’t overdo it! If anything, overloading the muscles could inhibit the development of your range of motion. Your muscles won’t allow you to go deeper into the stretch when they feel more vulnerable in that position.
4. Strengthening / Agonist
The final part of the sequence is designed to increase strength through the full range of motion by strengthening the agonist muscles. The agonist muscles for the pike/front fold are the hip flexors.
Supine Hip Flexor Lift – Strength Development
This is a great session for those who are new and starting out on flexibility work and for those whose strength through the range is limited.
- Lie supine with your legs out straight. You will need something to rest the leg you are strengthening on. This can be a door frame or squat rack, for example.
- Lift one leg and rest it on the door frame/squat rack. To really work end-range strength, start in a position where you can feel a stretch when your leg is resting.
- Engage the Hip Flexor and lift the leg to its end range towards your face, keeping your leg straight.
- Set the intention, which is strength development.
Intention – An integral part of developing flexibility is the ability to control and display your full range of motion using your own strength.
Recommended: 2 sets of 6 reps, with 30 seconds Inter Set Rest.
Once you become more comfortable with your leg upwards at 90 degrees, this session can be progressed to Barre Lift Medial.
- Stand with one leg lifted straight in front of you, resting on a bar, box or step.
- Lift the leg to its end range, keeping it straight.
- Change the height of the bar to progress or regress the difficulty.
- Set the intention, which is strength development.
Intention – An integral part of developing flexibility is the ability to control and display your full range of motion using your own strength.
Recommended: 2 sets of 6 reps, with 30 seconds Inter Set Rest.
For all of the exercises described, progress is easy to measure and track across time. With this in mind, it’s useful to have a goal in mind, to improve motivation and session satisfaction. Here are some useful ideas for getting started.
Goal Setting
Remember, when planning to complete a sequence of sessions over time (12 weeks recommended), it’s important to do so with a specific goal in mind. This will encourage you to stick with the sessions and will provide a reward for all of your hard work when progress has been made. Obviously, the goals that you set yourself will depend on your initial flexibility baseline.
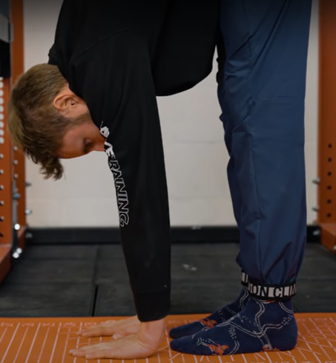
For example, the goal for this series of Pike exercises may be to be able to touch the floor with your fingers when forward folding in a standing position.
You could progress this in the following ways:
1. Reach down and touch a yoga block/object.
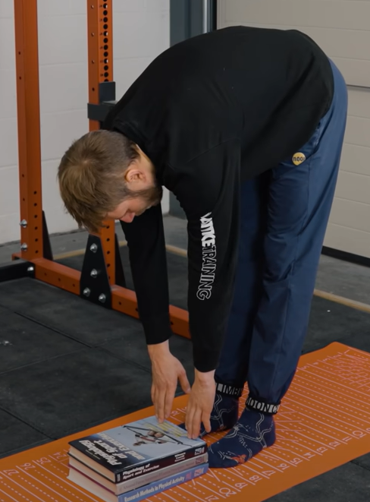
2. Reach down and touch the floor with your fingers.
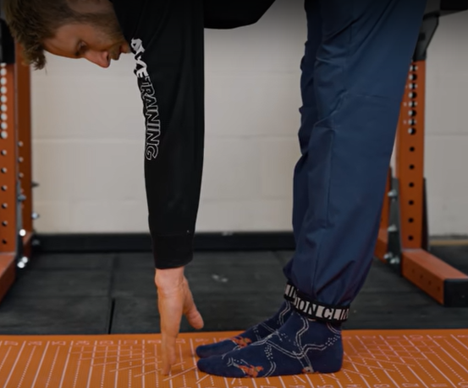
3. Reach down and touch the floor with your knuckles.

4. Reach down and touch the floor with flat palms.
This will help you gauge whether you are working at the right intensity and frequency, as you will be able to measure progress towards your goal. You can easily check in with how you’re progressing towards these goals at the end of each sequence of exercises. Keeping a record of your sessions in a diary, or on your phone, is a great way to keep a record of your training. If you feel like you hit a plateau with your flexibility work, then you know that it’s time to increase the intensity by elevating your leg higher, trying to access a greater range of motion or adding weight.
Alternatively, you may decide it’s time to focus on a different lower body position, such as the pancake.
If you’ve found this article helpful, you may wish to read our other articles in the series:
- Improve your pike
- Improve your pancake
- Improve your side split / middle split
- Improve your front split
Together, all these exercise sessions can be used to improve your lower body flexibility for climbing.
For a more accurate assessment of exactly where you need to start on your flexibility journey, you may be interested in our free My Flex Assessment
Interested in flexibility training plans or learning more? Check out our Flexibility Training Plan or our Flexibility Deep Dive course!
More from the Lattice Blog
Community Stories /
Job Vacancies /
LatticePlan /
News /
Nutrition /
Older Climbers /
Podcast /
Products & Services /
Research & Data /
Training /
Endurance /
Finger Strength /
Flexibility /
Mindset & Mental Training /
Sessions & Workouts /
Strength & Power /
Uncategorized /
Videos /
Webinars /
Women's Training Series /
Menopause /
Menstrual Cycle /
Pregnancy & Post-Pregnancy /